Converting Job
cieTrade.net's inventory module supports material processing via a Converting Job, allowing users to select feedstock or input items, define production costs and/or expenses, and create output or finished goods for sale.
Creating a New Job
To begin a new converting job, use the + icon on the Converting module in the Inventory tab or navigate to Inventory > Converting and click the New Converting Job button provided in the top right corner. This will generate a new worksheet for you to begin filling out.

Top Line Details

The Dept and Trade Type fields are optional and are used to track financial information for distinct divisions of a company and/or distinct financial centers related to the expenses created by the job.
Use the Warehouse drop-down to indicate the location where the material processing is taking place and where the output material will be located.
The Status drop-down is used to indicate whether the job is in WORK or POSTED status. A job that is in WORK status is still in progress.
The Posting-Date populates automatically with today's date when the job is moved to a POSTED status. This is a 'financial' date that represents when the expenses on the job are recognized and when the output items are created in your inventory.
It is important to note that input and output items that are associated with a job in WORK status will not be available to other users, jobs, allocations, and shipments.
Use the Warehouse Status dropdowns to make the converting job available in the Warehouse module.
Job Details

The Machine drop-down is used to specify the processing equipment that is being used to complete this job.
To add a new converting machine to this list, please see help article here.
Use the Operator drop-down to select the user performing this job. This will default to the user entering the job automatically but can be changed if desired.
The Job Date, Start, and End fields are all optional references that can be used to further define the job schedule.
A Default Supplier must be selected in order to define the supplier for the converted or output items.
The Output UOM must be pre-defined for the job and must match all output items on the job.
A Job Description can be entered to describe the event, circumstances, or process related to this job.
The remainder of the converting job is broken down into three parts:
- An Expenses section allows for the recording of an expense or expenses to be allocated among the inventory items created.
- The Input section identifies the specific inventory items being processed.
- The Output section defines the specific inventory items that this job has created and that the expense(s) entered above will be allocated among.
Expenses

To add expenses to the converting job, click the + Add Expense button provided in the expenses section.
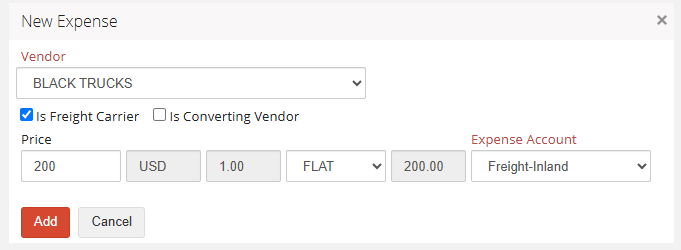
Use the drop-down provided to select the Vendor invoicing you for the expense.
If the expense is a charge from a freight vendor associated with moving the material to and from the converting job, check off "Is Freight Carrier".
If the expense is a charge from a third party vendor processing the converting job, check off "Is Converting Vendor."
Note: If the expense is for your own company, you can select (Other) as the vendor to enter operator costs or material processing expenses).
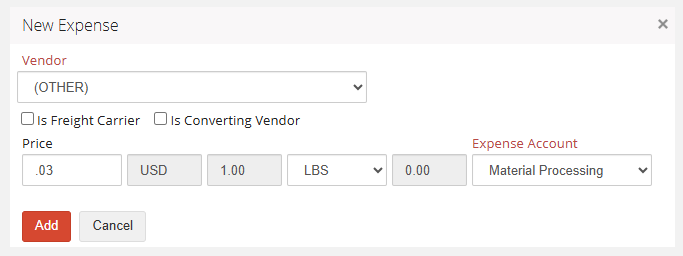
Enter the Price and Price Unit of Measure (e.g., FLAT, per LBS) from your vendor's invoice. If a per weight unit of measure is selected, the Price entered will be calculated off of the total quantity of your Input (discussed below).
Once a Vendor is selected, the vendor's default Expense Account will populate. This can be updated manually if needed if the default that pulls through is incorrect for this type of expense.
Entering Input and Output Inventory Onto the Job
Depending on the inventory type that was set up for the grades being chosen on this job, there are a few different ways to fill out the worksheet. These options are listed below.
Converting Serial Input Inventory to Serial Output Inventory
Input:
In order to process material through the Converting Job, source stock must be added to the Input section. To add serial Input items to the job, click the Select Inventory button.

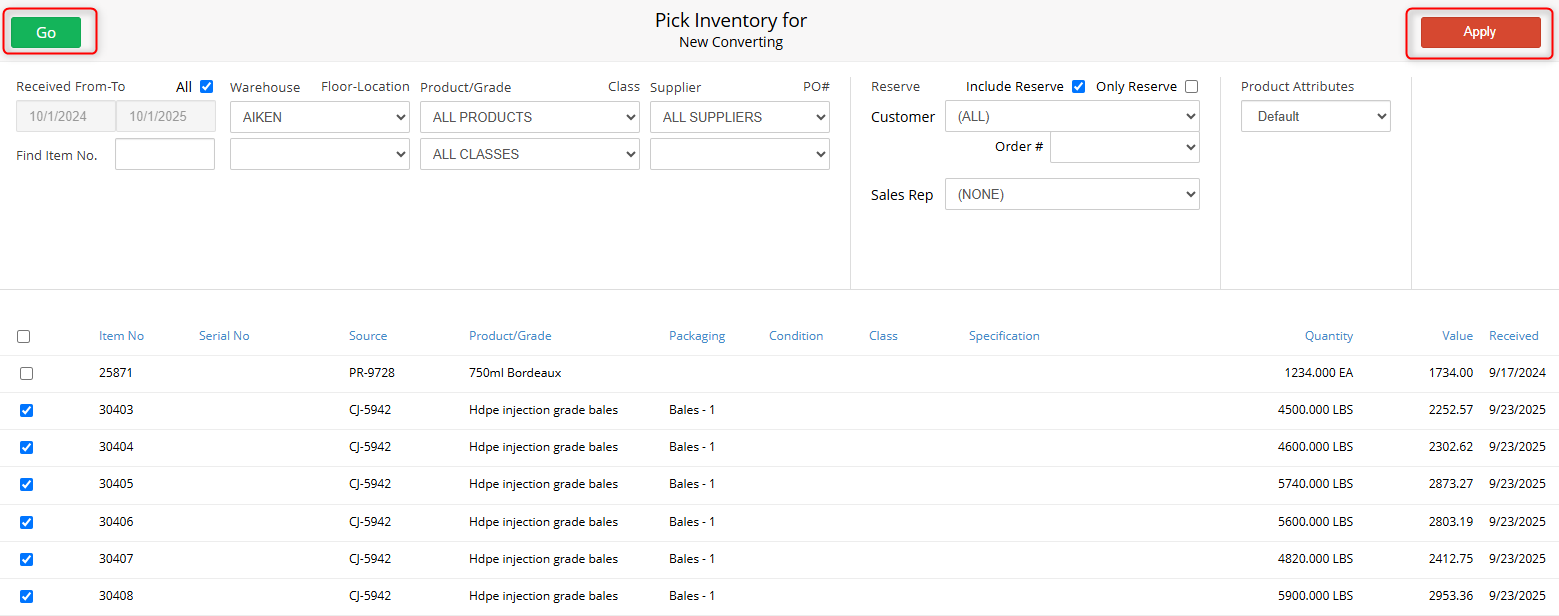
The Pick Inventory page provides search options for the application of source stock to the converting job.

A user can search by:
- Item No.
- Warehouse
- Product/Grade
- Class
- Received Date
- Item No.
- Supplier
- PO-No.
- Reserve
- Customer
- Order #
- Sales Rep
- Product Attributes
Any combination of filters can be used to locate the needed inventory items. Use the green Go button to search using the selected filters.
Once search results have been returned, use the check boxes to the left of the inventory item(s) to pick the source stock and then click the Apply button in the top right corner of the page to add the selected item(s) to the converting job.
Output:
The final step in processing material through the converting job is to create your Output items. There are two options to add output items.
a. batch create serial output that are uniform. Click here for a help file.
b. one by one serial output
For B: To add serial output items to the job, click the + Add Item button provided in the output section. If you want to create a batch of uniform items in the output, click here. 
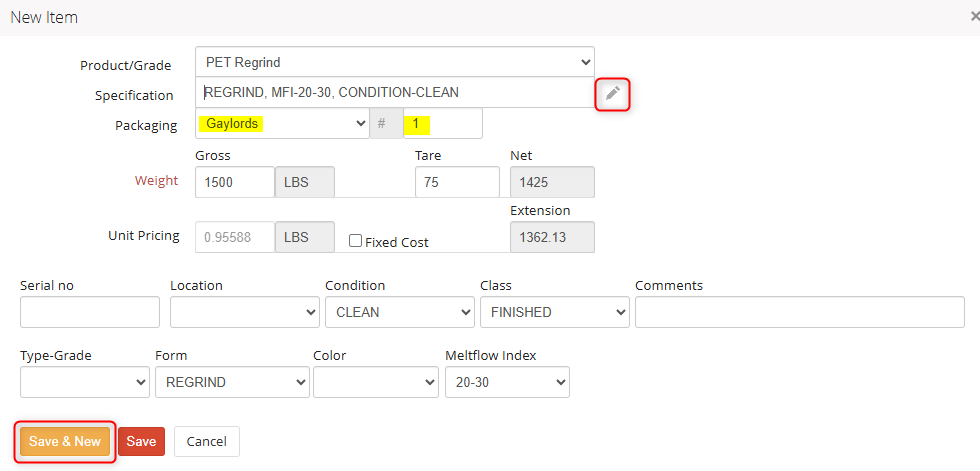
Select the Product/Grade being produced from the drop-down menu.
cieTrade.net has the flexibility to handle paper or plastics Specifications, such as meltflow index, color etc. These specifications will appear on any documentation you later generate relating to this particular product (e.g., the Bill of Lading Short Form). The appropriate specification fields will appear at the bottom of the detail window based on the Packaging type selected.
If applicable, use the # field to the right of the packaging drop-down menu to enter the number of units being produced. Enter the Gross and Tare of the material being received or simply enter the Gross weight to populate the Net Quantity field. The Location, Condition, Class, and Comments are optional fields that may be used to further define the item.
NOTE: When converting to a serial output item, you must enter in a packaging quantity of one, and enter the weight of each individual package. You must create a separate product line per package in order for cieTrade to generate a unique item number for each package.
Once the paper or plastics specifications have been entered, clicking the pencil icon to the right of the specification field to have the details populate.
Click Save & New to enter in the weight and specifications of the next item more easily. This will keep the product, packaging type, tare weight and specifications the same for the next lot, to save you time!
Converting Bulk Input Inventory to Bulk Output Inventory
Input:
To add bulk input items to the job, click the + Select Bulk button provided in the Input section.
 On the Select Bulk Inventory page, select the Grade/Product to be converted.
The Qty On Hand shows the total quantity of the bulk inventory item available in the warehouse. This list will only be separated if the inventory has a different Class or Location associated with it.
Select the inventory you would like to convert using the check box. The Quantity is a typeable field, allowing the amount being pulled onto the converting job to be adjusted as needed.

Click Apply to add the selected item(s) to the converting job.
Output:
Click the + Add Item button provided in the output section.
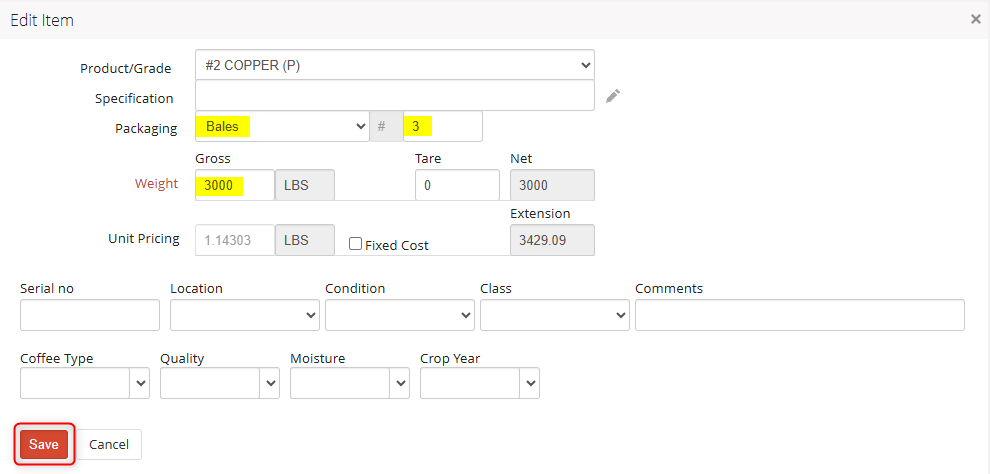
Select the Product/Grade being produced from the drop-down menu.
If applicable, use the # field to the right of the Packaging drop-down menu to enter the number of units being produced. Enter the Gross and Tare of the material being received or simply enter the Gross weight to populate the Net Quantity field. The Location, Condition, Class, and Comments are optional fields that may be used to further define the item.
NOTE: When converting to a bulk output item, you must enter in total packaging quantity, and enter the total weight of the converted material. This will create one line for the entire quantity of the product produced.
Click Save to save the output item.

Converting Bulk Input Inventory to Serial Output Inventory
Converting from Bulk Inventory to Serial Inventory follows the same steps outlined above. Follow the instructions for adding Bulk Inventory Input as listed in "Converting Bulk Input Inventory to Bulk Output Inventory" and add Serial Inventory Output by following the instructions listed in "Converting Serial Input Inventory to Serial Output Inventory."
How Costs are Applied to Output Products
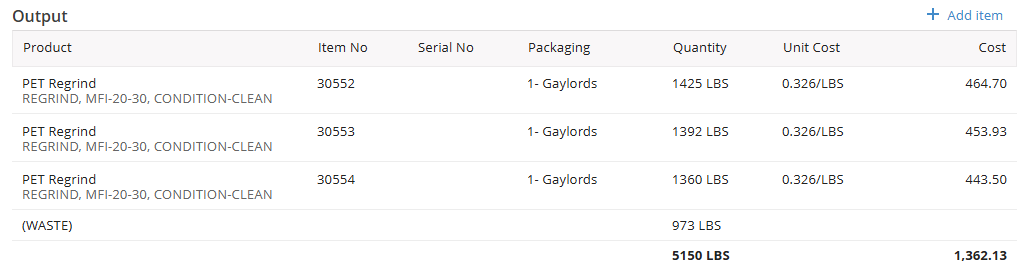
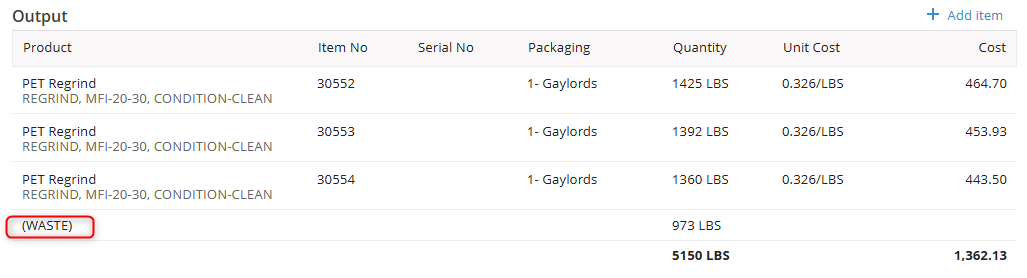
If the total quantity converted on the job is less than the input quantity, cieTrade will automatically produce a Waste grade for the remaining quantity. The cost of the waste material will factor into the unit cost of the output items.
NOTE: A waste grade can be tracked in inventory if needed by creating a Product in the system and applying the missing weight to that grade.
Additionally, any Expenses added on the converting job will also be factored into the unit cost of the output items. In total, the output cost factors in any waste, the input material cost, and expenses and applied those evenly by weight across all output items.
Instructions & Notes
The Buy Rep field allows for a Buy Rep to be assigned to the converting job.
The Converting Instruction and Converting Disclaimer fields allow instructions for the converting job to be entered and saved as templates. These two fields will automatically populate on the Converting Instructions document, which can be given to warehouse employees.
The Delivery Address and Pickup Address fields allow for delivery and pickup addresses for the material being converted to be entered and saved as templates. These two fields can be pulled onto documents as needed. 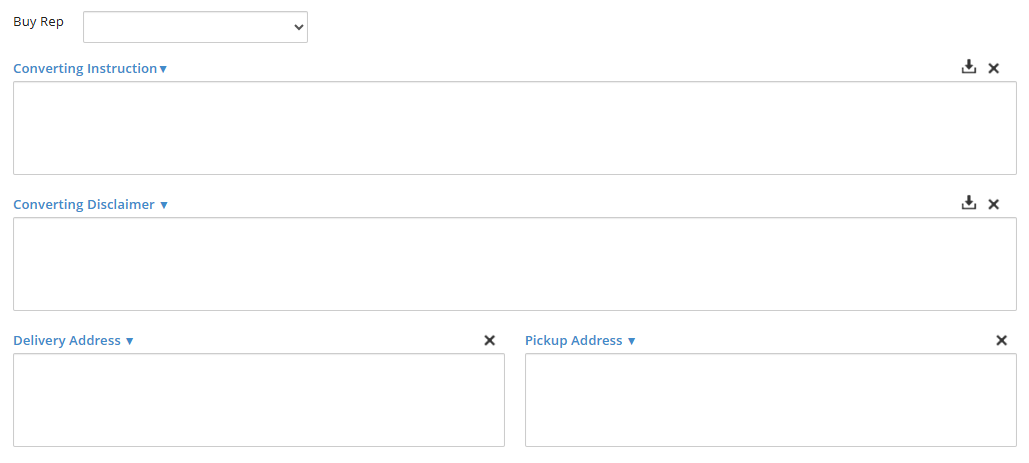
Once the information on the Converting Job has been entered completely, the status should be updated to POSTED in order to create the output item(s) entered and accrue the necessary payable(s) for your Vendor(s). These payables will be created directly in the AP Ledger and will be available for posting as soon as the Converting Job has been Posted.
How to Reverse a Converting Job
If necessary, a Posted Converting Job can be reversed, given the following: it must have been posted within the current open period; the output items created must not have been sold out on a Posted Shipping Worksheet; and the associated payables must not have been paid. To undo a job, simply click the Edit Job button in the top right corner and then change the status from POSTED to WORK. Saving a previously Posted Converting Job in WORK status will remove the associated Expenses from the AP Ledger and remove the associated Output Item(s) from your available inventory.
If you have additional questions, please contact the Support Team via email to support@cietrade.net.