How to Modify or Edit Documents on the Document Designer Tool
Users can now customize several documents using our new Documents Designer Tool.
To begin customizing your documents.
1. Go to the Settings > Documents > Document Types
2. When you select the document desired, four button options will populate – Edit, Copy, Reset and Delete
3. Click the Edit button to modify your document, which will open the Document Designer Tool.

4. To edit the name of a text field, in this case the Invoice Name, simply double click on the text field to rename the field

5. To modify the font size of your field, go to the left-hand panel, under Text, and select the desired font size from the dropdown list. You have the ability to expand the text box to accommodate any changes.

6. To add a dynamic field which is output data that comes from your database. Click on the third button down on the left-side menu of the Designer Tool then click Text. From there you can position the text box on to the section where you want this field to show.
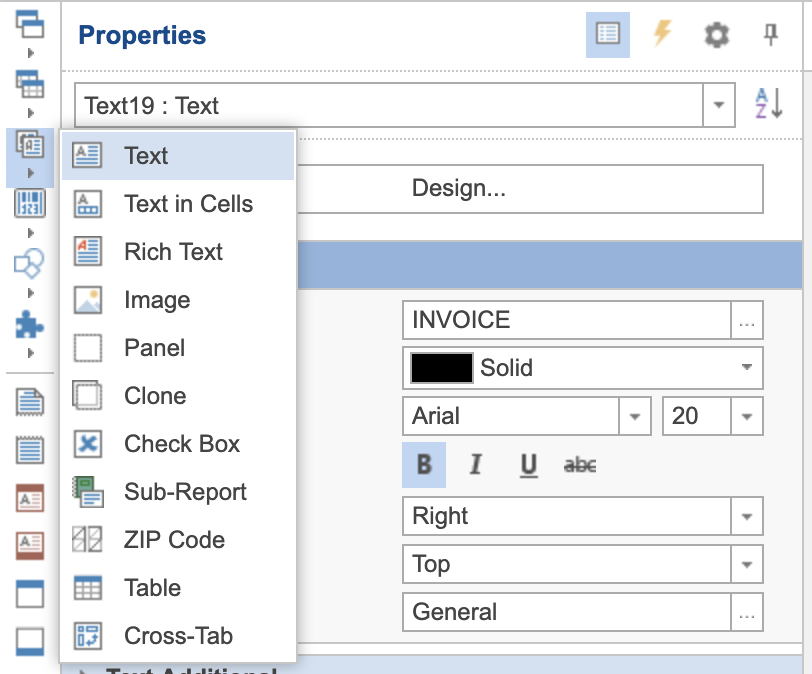
7. Next click on Data Column and expand Headers. Click on the field that needs to be added, then click OK.

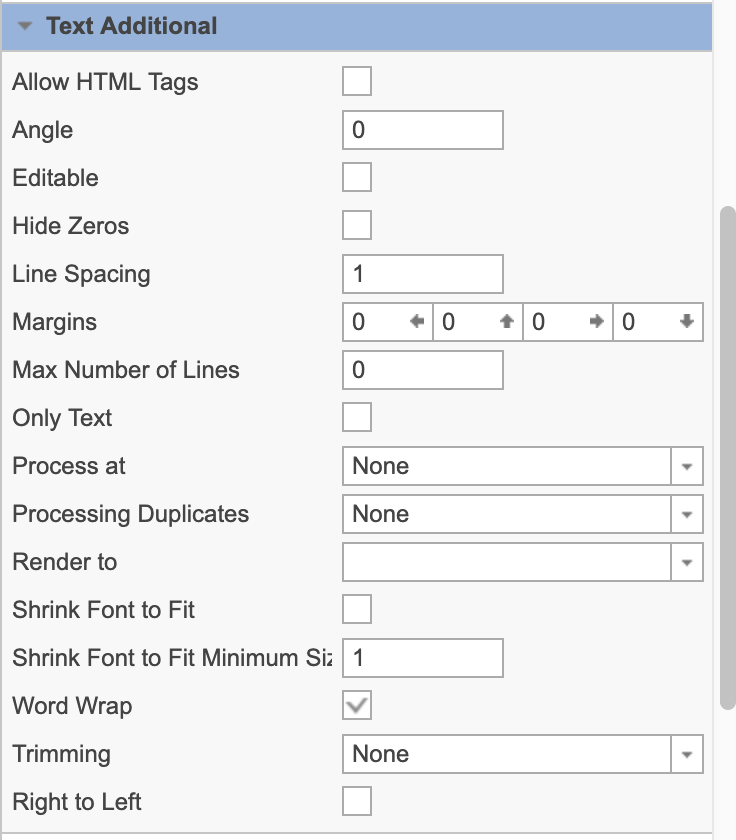
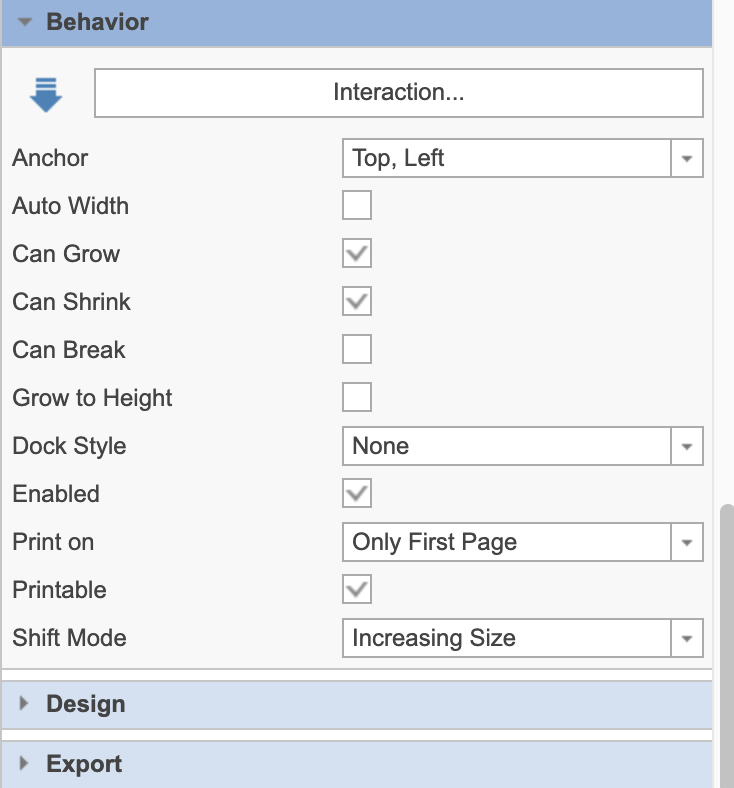
8. To modify the size and width of your text box. Click on Text Additional, check the box next to Word Wrap, then on Behavior, click the check box next to Can Grow. This will allow the text box to expand automatically.
 To make any additional changes on the header, double click on the text box you would like to edit, and make your changes.
9. To hide a field, select the text box, then on the left side panel, on Behavior Tab uncheck the box next to Enable.
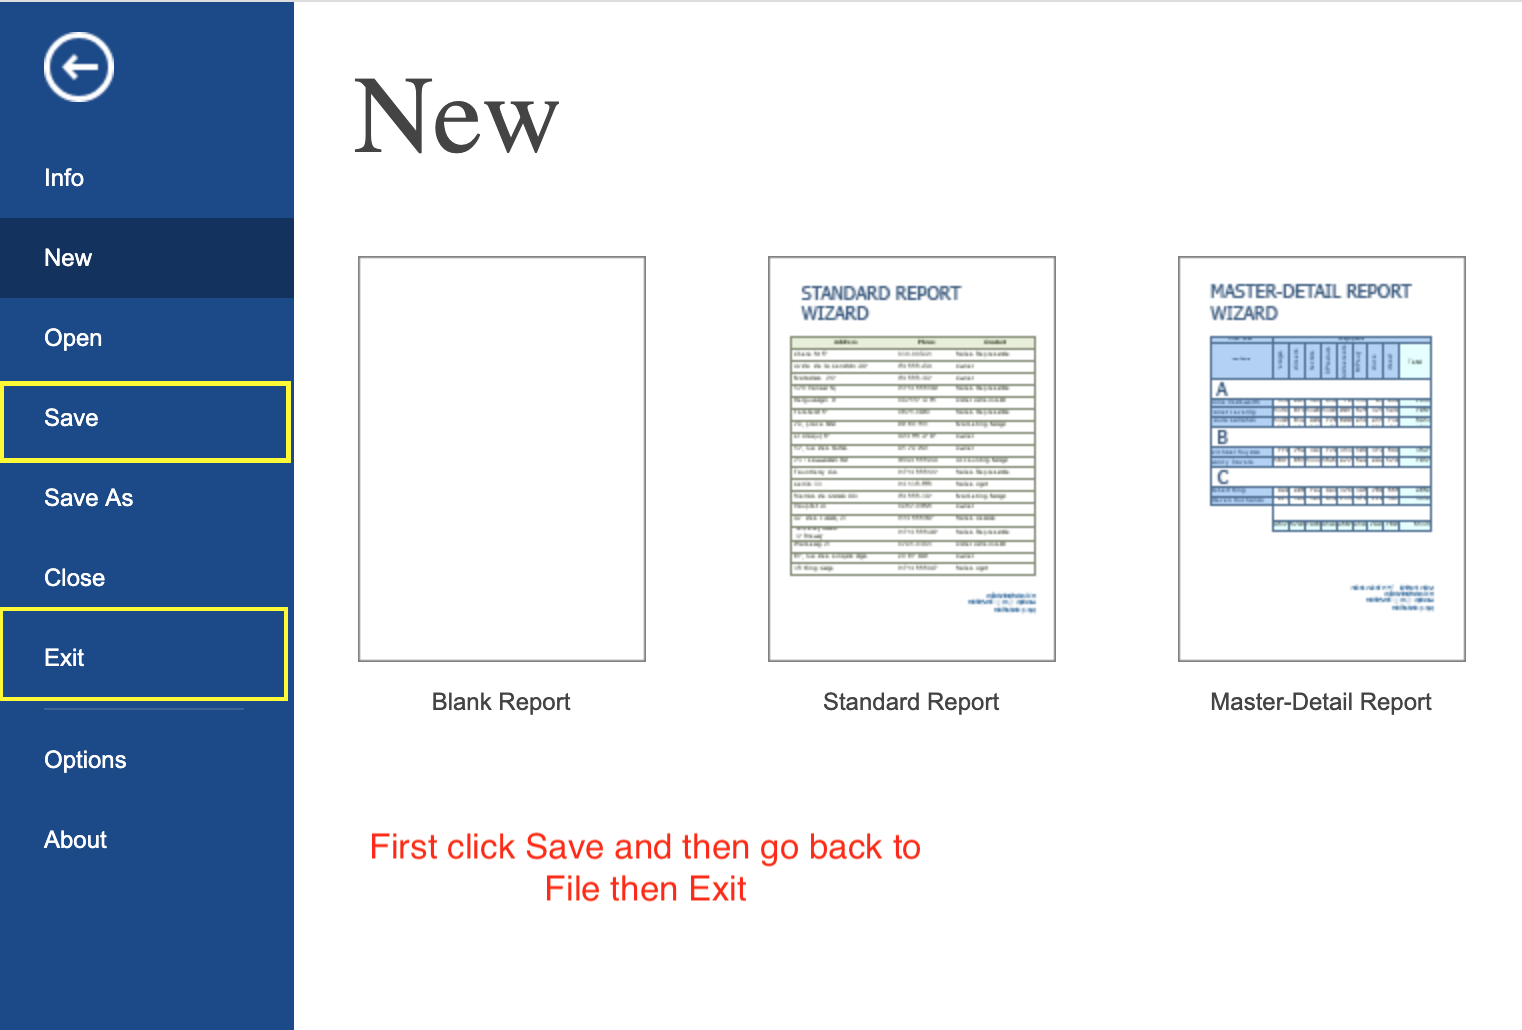
11. Save your document by going to File > Save then to exit, simply click on File > Exit

10. Finally go to the back to your worksheet to review the changes made to your documents.
If you have additional questions, please contact the Support Team via email to support@cietrade.net.