Inventory Upload Template
This guide provides instructions for uploading existing serialized inventory into cieTrade using the provided Inventory Import Template. This process is intended for importing inventory items that already exist in your warehouse, including their serial numbers, carrying costs, and other relevant details.
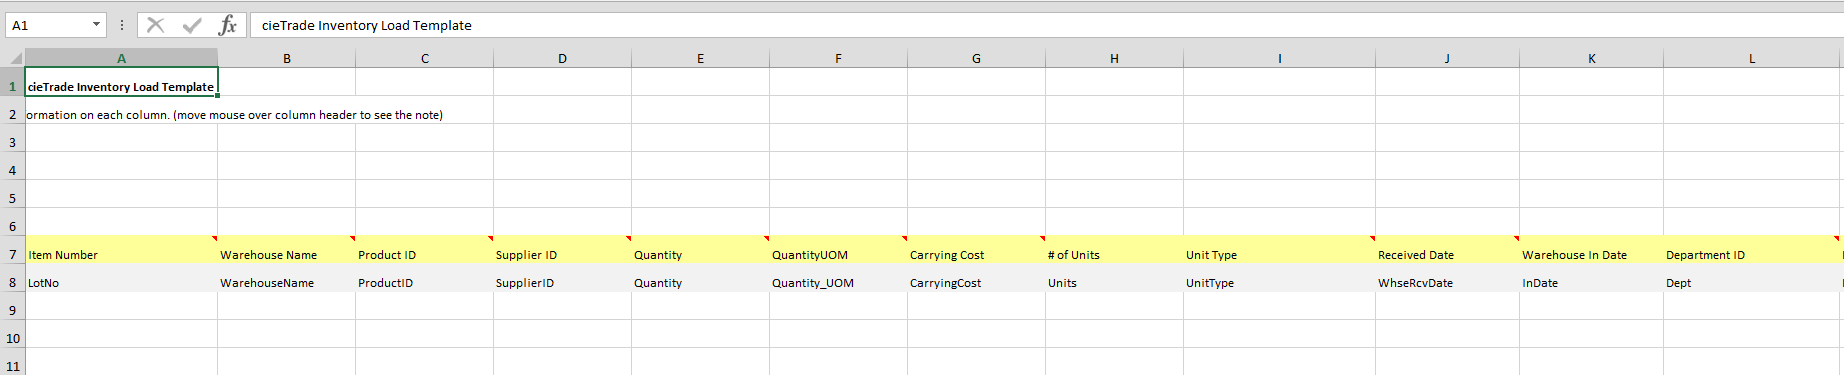
Before uploading, ensure that your data is entered into the provided cieTrade Inventory Import Template exactly as shown. Do not modify column names, order, or formatting. Each row should represent a single serialized inventory record.
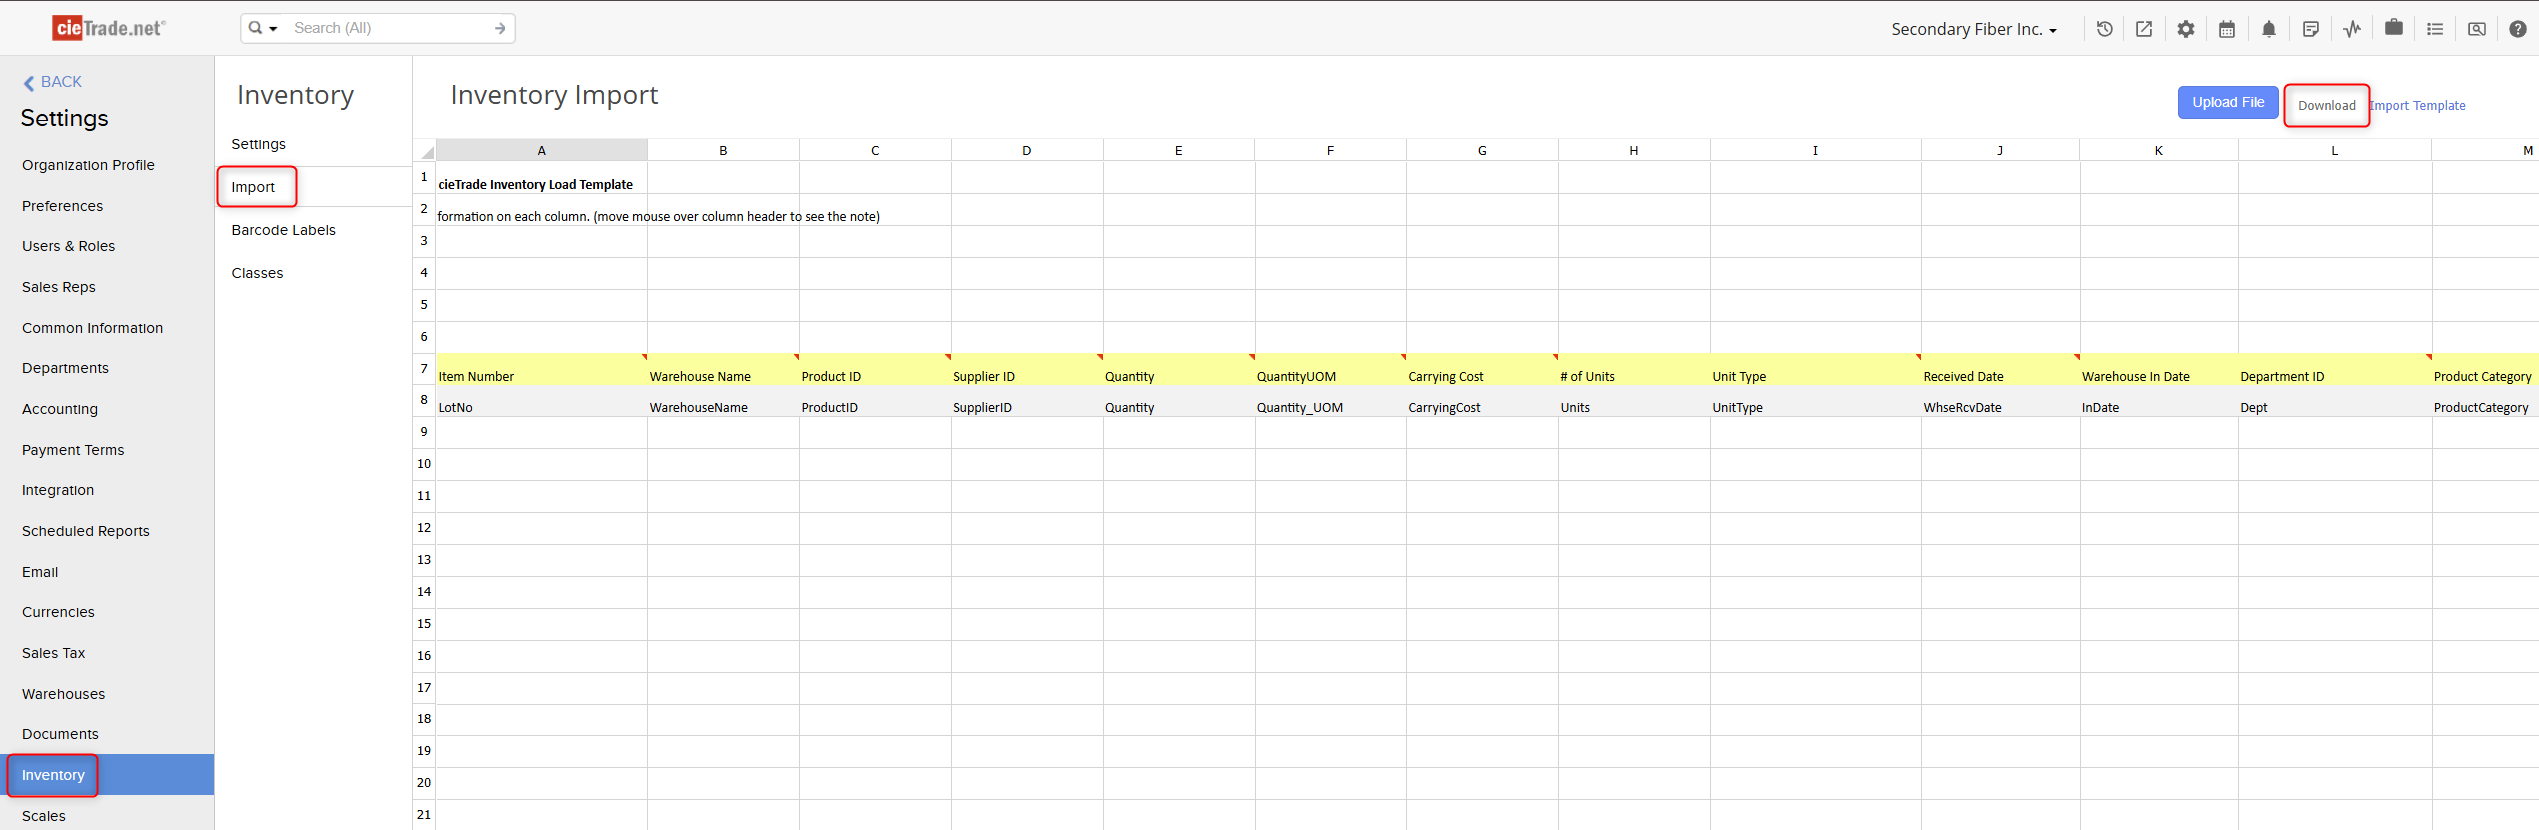
To get to the inventory upload, navigate to settings > inventory > import and choose to download the template. Downloading will allow you to save the template to your computer.
Key preparation guidelines:
- Do not delete or rename any columns in the template.
- Only fill in rows below the header row.
- Remove any blank rows before uploading.
Field Definitions
Below is a summary of each key field included in the Inventory Import Template.
- Item Number (Required): Unique identifier or code for the inventory item that will be assigned by cieTrade upon uploading. For initial uploads, "NEW" can be entered for inventory items in this column.
- Warehouse Name (Required): This is the warehouse name where the material is currently at.
- Product ID (Required): The system’s internal product ID that corresponds to the item. This must match exactly what is in your product list.
- Supplier ID (Required): The supplier’s name exactly how it is shown in cieTrade.
- Quantity (Required): Total quantity on hand of the item.
- Quantity UOM (Required): Unit of Measure for the quantity (e.g., EA, LB, KG).
- Carrying Cost (Required): The financial carrying cost per unit or lot, if applicable, should include any expenses for receiving the item such as freight.
- # of Units (Optional): The number of serialized units associated with the record.
- Unit Type (Optional): Type or category of the unit (e.g., Bale, Pallet, Roll).
- Received Date (Required): Date the item was received into cieTrade, this must be the last day of the month prior to your first transaction in cieTrade. For example, if you went live in cieTrade on September 1st, which is when your first transaction is, the received date should be August 31st.
- Warehouse In Date (Optional): This can be the date that the material was actually received into your warehouse. This does not need to match the Received Date column.
- Department ID (Required): This must match the Department Name in cieTrade.
 The below fields are optional and can be used to capture specifications of the products being uploaded such as paper, roll, and plastic specifications. If your products do not include any of this information, you do not need to put anything into these fields.
Product Category, Product Group, Mill, Brand, Condition, Color, Location (in your warehouse), Caliper, PO Number, Warehouse Bin, Gross Weight, Tare Weight, Comment, Diameter, Diameter UOM, BW, BW UOM, RW, RW UOM, Core Size, Core UOM, Linear Length in Feet, Sheet Size, Size UOM, Number of Sheets, Finish, M-Weight, Plastics Type or Grade, Plastics Form, Color, Melt flow Index, Inventory Class, Serial Number, User Defined 1-4.


 Once you have completed entering all required information into the template, re-upload into cieTrade by navigating back to the import page and selecting upload field. You can browse your computer files to find the import. If there are any errors with the information entered, the upload will fail and the field with the error will be highlighted in red with an explanation of what needs to change prior to upload.
To ensure you inventory was uploaded correctly, check the Inventory Manager to review your on hand inventory levels.
If you have additional questions, please contact the Support Team via email to support@cietrade.net.