How to use clickBale
This help file covers how to use the clickBale app. If you need to set it up, click here.
clickBale lets you create bales to overlay your current inventory model and print bale barcodes. NOTE: this does not affect your inventory in the system. 
Receiving inventory: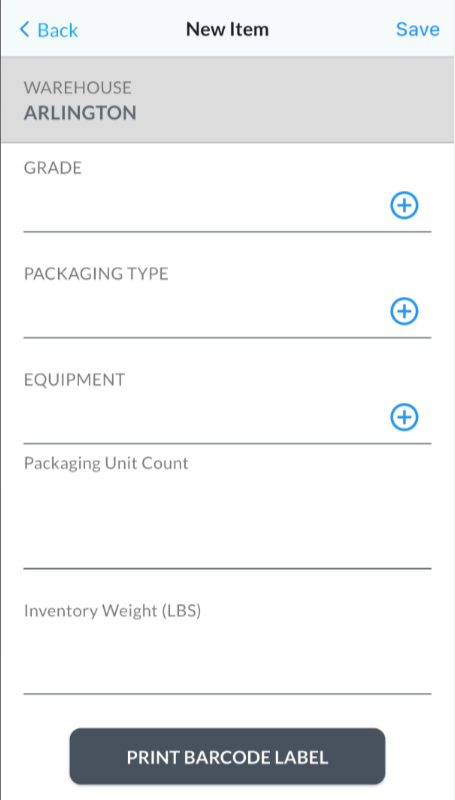

1. Login to the app
2. Click the + in the upper right to add a new inventory position
3. Select the grade from the drop down
4. Select the packaging type from the drop down
5. Select the Equipment.
Please note: both the grade and packaging type are required to save this screen
5. Enter the number of units
6.Enter the inventory weight
7. Print the barcode label and click Save.
Shipping Inventory:

1. The warehouse will default to your users' defaulted wh selection.
2. The customer is not selected since this is a bale count tool.
3. Enter the Load number of the shipment.
4. Click on the + button to pick the grade being shipped.
5. Click the + button to select the packaging type of the inventory being shipped.
6. Click + to pick the equipment.
7. Enter the Bale weight. This can represent the entire shipment or it can represent a single bale.
8. Click into the # items to denote how many bales are being shipped.
Alternatively you could scan the click bale barcode that you created with the receiving portion of click bale to populate the above information.
9. Click Save.
Viewing Inventory:

1. On the main menu, click Inventory.
2. Here you will see all of the inventory that you have created on clickBale under Receiving. The average is the overall weight of each entry divided by the number of units.
3. To Modify or delete this inventory, take your finger and swipe to the left on the inventory line.

Viewing clickBale Transactions:

1. On the main menu, click Transactions.
2. The Warehouse is the user defaulted warehouse.
3. The list of transactions show what this logged in user has created for receiving and shipping baled inventory.
4. The green downward arrow represents inventory created with clickbale receiving tab. The upwards red arrow denotes outbound clickbale shipments.
5. The bolded grade shows the grade that was selected on the receiving or shipping transaction.
6. Below the grade if it is a clickbale receiving entry, it will show a + then the weight that was received or a - weight that was shipped and UOM it was received in. Next to the weight is the number units, then the unit type it was received as and the equipment it was received on.
7. On the far right is the date and time the transaction took place.
Settings (Add a printer):
1. On this tab you can select your barcode device. Click Add Printer.

2.cieTrade offers three options on how to connect. Select which one you want to use.
 3. If you select Bluetooth, your device may ask your permission to find bluetooth devices within range. If you select photos, you will be prompted to allow clickbale access to your device photo library.


3. Click Allow to see a list of local bluetooth options. If you dont see your printer, please check that it is enabled with bluetooth functionality, is turned on, and is findable.
4. To refresh the list of bluetooth items to be found, click the refresh button at the top of the page. Each row should contain 3 things 1) Top line: The printers name (in bold) 2) Second line: the device ID and 3) Right side: the device signal strength, so you can see which printer is closest to to them.
5. If you choose via wifi, click on the ? icons to walk you through finding required information on the printer in order to connect

6. Once you have selected a printer, you will be prompted to select what type of device it is. This is to help set up the barcoding label configuration
 7. Once that is selected, you can optionally change the label by clicking 'Calibrate Label'.

8. On the main setting page, to log out of the app, click Log Out.
To see the system report, click here.
If you have additional questions, please contact the Support Team via email to support@cietrade.net.